How to Make Printable Iron on Transfers – Searching for a How to Make Printable Iron on Transfers? We’re providing it at no cost. You can start the download now and print it simply, so you can dive in without delay. It’s our way of simplifying your process.
Are you looking to add some personalized flair to your clothing or accessories? Making your own printable iron-on transfers is a fun and easy way to customize your wardrobe with unique designs. Whether you want to create matching shirts for a family event, add a personal touch to a gift, or simply express your creativity, printable iron-on transfers are a great option. With just a few simple supplies and a bit of creativity, you can easily create your own custom iron-on transfers at home.
To get started, all you need is a computer, a printer, iron-on transfer paper, an iron, and the fabric or item you want to transfer your design onto. You can find iron-on transfer paper at most craft stores or online. Make sure to choose a paper that is compatible with your printer type (inkjet or laser) to ensure the best results. Once you have your supplies, you can begin creating your design using graphic design software, clip art, or even hand-drawn artwork. The possibilities are endless when it comes to designing your custom iron-on transfers.
Create Your Design
When creating your design, be sure to consider the size and placement of your transfer on the fabric or item. You can use a ruler or measuring tape to determine the dimensions you want for your design. Keep in mind that the design will be mirrored when transferred onto the fabric, so be sure to flip your image horizontally before printing. This is especially important if your design includes text or other elements that need to be facing a specific direction.
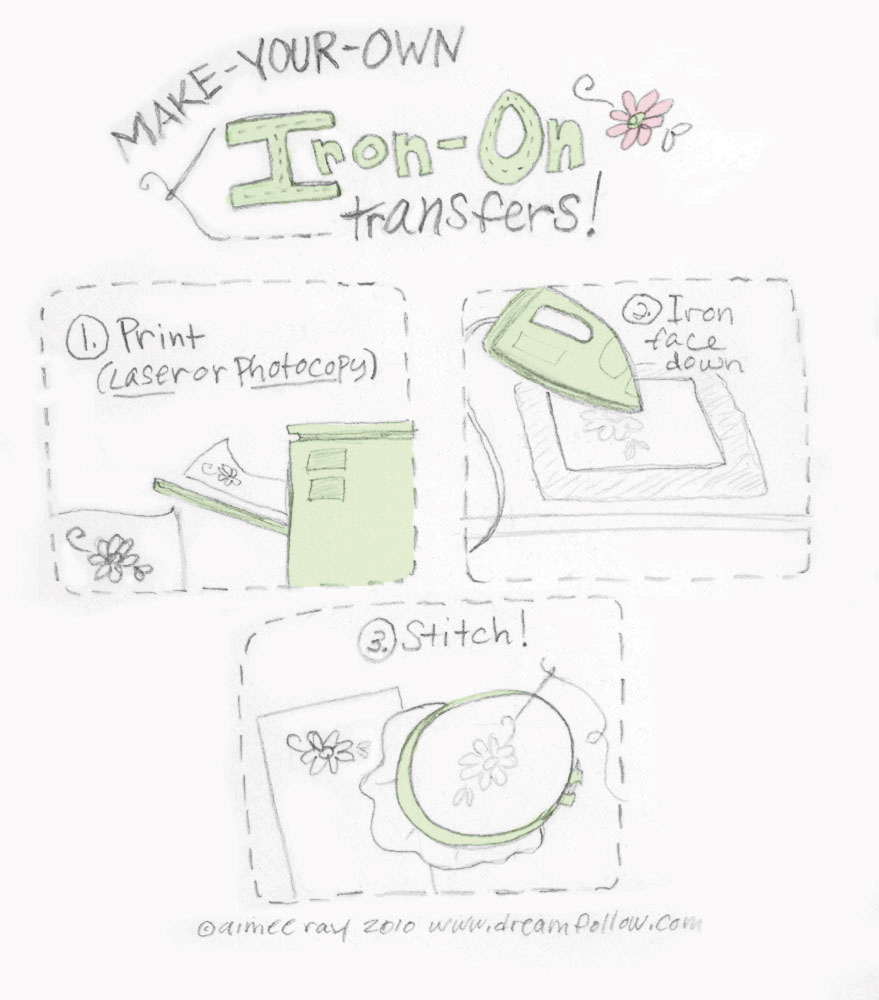
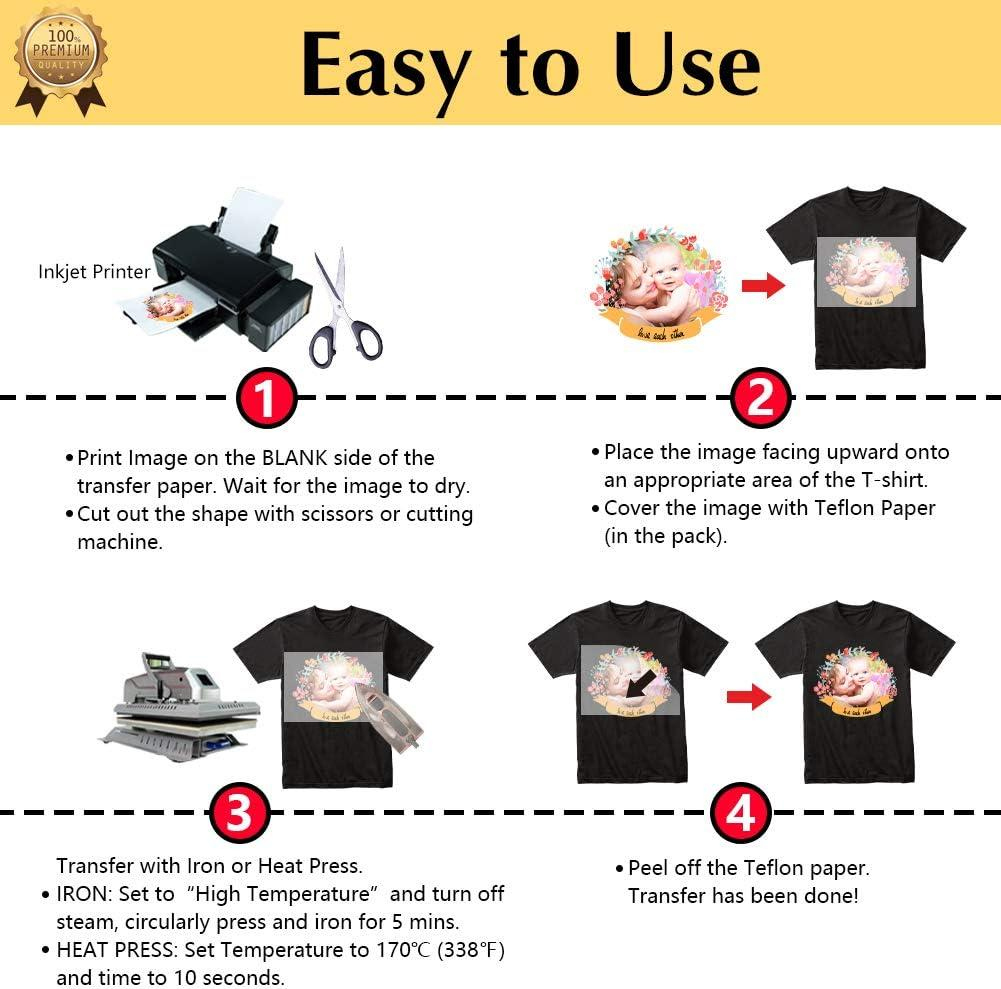
Once you have finalized your design, it’s time to print it onto the iron-on transfer paper. Follow the instructions provided with the transfer paper to ensure proper printing. Be sure to print on the correct side of the paper (usually the matte or unmarked side) to ensure a successful transfer. After printing, allow the ink to dry completely before proceeding to the next step. Now that you have your design printed, you’re ready to transfer it onto your fabric or item.
Transfer Your Design
To transfer your design onto fabric, start by preheating your iron to the appropriate setting for the type of fabric you are using. Place the fabric on a hard, flat surface and smooth out any wrinkles. Position your printed design face down onto the fabric in the desired location. Apply firm, even pressure with the heated iron to transfer the design onto the fabric. Be sure to apply heat to the entire design, paying special attention to the edges and corners.
Once you have applied heat to the entire design, carefully peel away the backing paper while the transfer is still warm. Take care not to smudge or shift the design as you remove the backing. Allow the transfer to cool completely before wearing or washing the fabric. Congratulations, you have successfully created your own custom iron-on transfer! Whether you’re making matching t-shirts for a group outing or adding a personal touch to a gift, printable iron-on transfers are a fun and easy way to express your creativity. Give it a try and let your imagination run wild with endless possibilities for custom designs.
How to Make Printable Iron on Transfers

Related Printables..
Disclaimer: We make every effort to use royalty-free or appropriately licensed images. However, if an image is mistakenly used without proper permission, please inform us. We are committed to correcting errors and will remove infringing content upon verification.